In the fast-paced world of APIs, time is money. Whether you're a seasoned developer or a curious newcomer, the ability to send and analyze API calls efficiently is crucial. This is where Postman comes in—a powerful tool that transforms API exploration from a tedious chore into a streamlined superpower.
In this post, we’ll explain what makes Postman an advantageous tool for developers working with Navixy, as well as how to place your first few API calls, including user authentication, user key creation, and tracker data.
Why use Postman?
Before we dive into discussing how to use Postman, let’s first tackle what makes this platform so great:
- No more command lines: Ditch the cryptic cURL commands and embrace a user-friendly interface. Postman lets you build requests with drag-and-drop ease, so sending GETs, PUTs, and beyond is a breeze.
- Request and response visualization: No more squinting at raw text. Postman presents your requests and responses in a clear, organized format, making it easy to understand what's going on under the hood.
- Effortless testing and debugging: Postman's built-in testing features allow you to write pre-request and post-request scripts, validate responses, and pinpoint errors with ease. This saves you precious time and frustration during development.
- Collaboration made easy: Share your API collections and environments with colleagues so your team can work together seamlessly on API integrations. No more reinventing the wheel for every project.
- Supercharged productivity: Postman offers a plethora of features that streamline your workflow, such as code generation, environment management, and even a built-in mock server for testing offline.
How to use Postman with Navixy
To demonstrate how Postman facilitates working with API, we’ll walk you through how to get set up and place your initial calls.
Getting started: fork collection
To first access our Postman Integration, you can follow the link here. In order to run these, you must initially fork the collection and environment to make it your own.
To fork, please have the “First Start” collection opened and find the “Fork” button on the right-hand side:
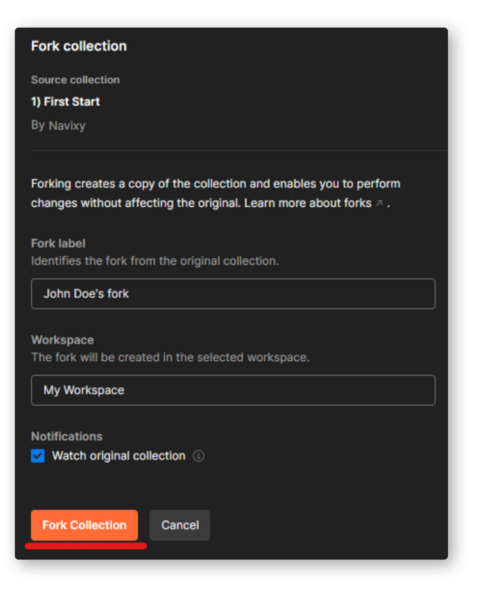
Clicking it will open a new tab asking where you would like to fork it to. Select the workspace you wish, or by default it will send it to “My Workspace”:
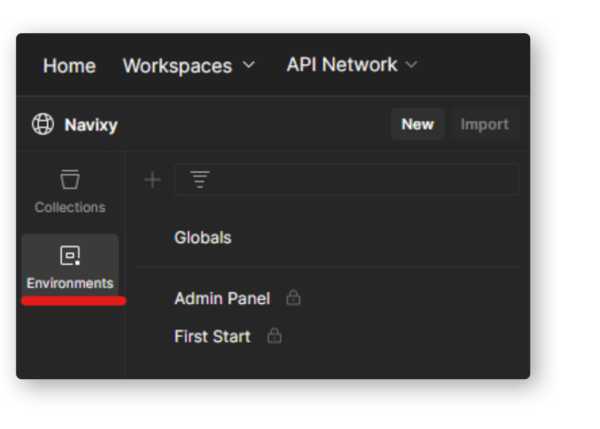
Click “Fork Collection” and the collection will become yours! Before proceeding, we also recommend you fork the environment as well. That way, it’s easier to keep track of all of the variables involved. Head to the Environment tab from the Navixy workspace here:
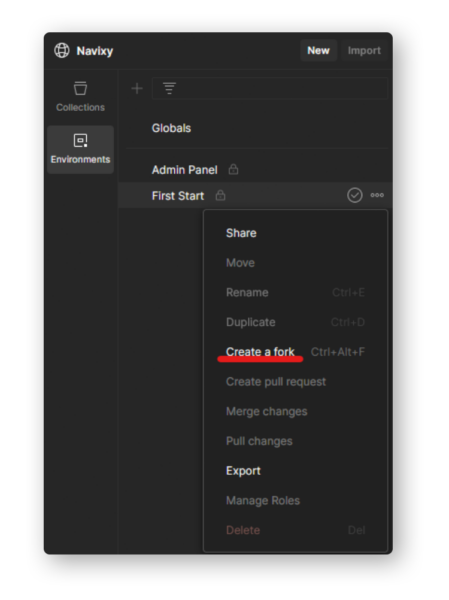
Find the “First Start” environment, click the three dots, and click “Create Fork”:
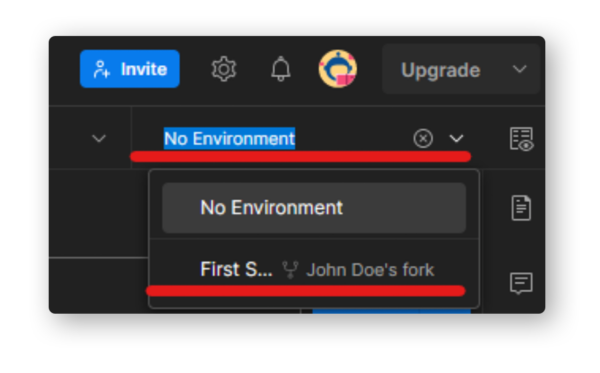
Choose the “First Start” environment from the drop-down on the right-hand side, and you’re ready to start!
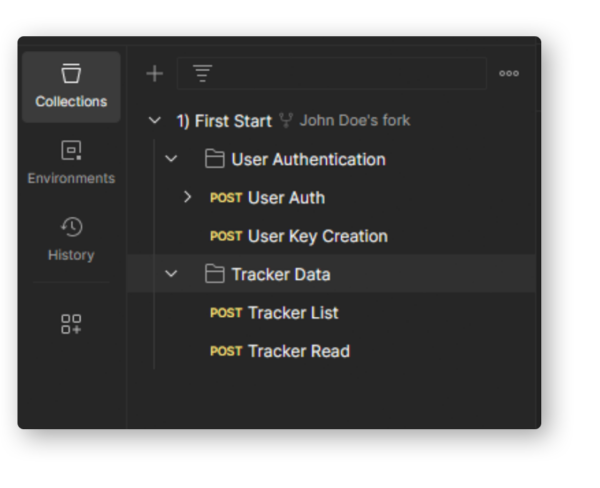
The First Start collection gives you a brief overview of how to run your first API calls from Navixy, such as what the calls are for and how to run them. For example, under “User Authentication,” you’ll see a short description for the two calls that are listed.
User authentication call
Let’s start with the User Authentication call, which is considered the most important API call since you will be required to run it before you’re able to start other calls.
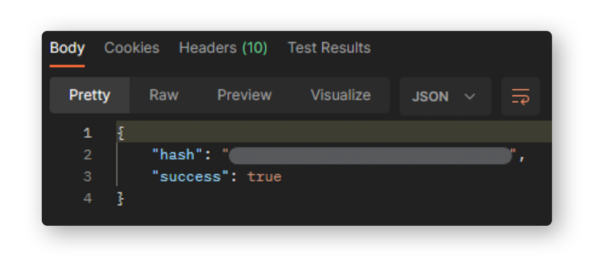
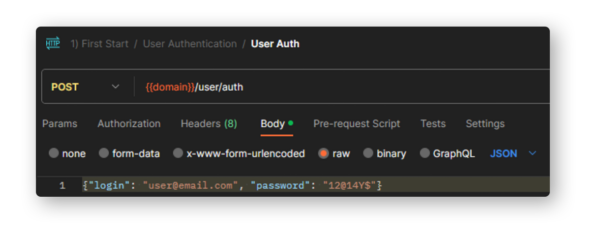
This call is used to get your initial API key. The key you receive can be used to run future calls, though it has an expiration date. In the “Body” tab within Postman for the call, you can see the two fields you’re able to adjust —“login” and “password.” You must input your login information and it will be securely sent to our platform to return the requested API key. Once the login information has been entered, simply hit “Send” on the right-hand side and it will return data as shown below (I’ve blurred my hash for security reasons) underneath the call:
Congratulations! You’ve successfully run your first API call with Navixy and Postman.
User key creation
Now we recommend running the “User Key Creation” call. This creates a permanent API key to use forever unless deleted. As mentioned, the hash we just received is only a temporary one. To run the “User Key Creation” call, select it from the collection and open the Body tab:
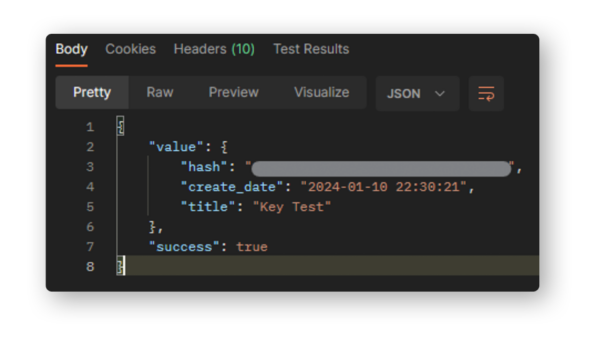
You will input the hash you received earlier in the hash field here. Then, name it according to your needs. Click “Send” on the right, and voila! You’ve run a second API call. The output will be similar to the below:
From here, we recommend you take the hash received and input it into the First Start environment variable for ease of use later:
Be sure to hit save, so you can easily use the permanent hash you created later without having to go back and find it.
Tracker data
Now that you have your API key created, you can run any platform-related API calls. For example, within this same collection you can see “Tracker Data” which contains two other calls—Tracker List and Tracker Read.
These two calls are fairly straightforward. Tracker List shows all trackers associated with the user whose hash you received earlier. Tracker Read shows basic data relating to the tracker you specify.
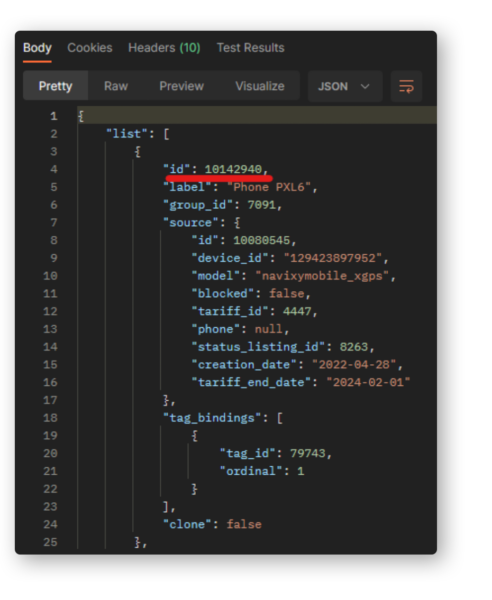
If you set up your environment variables, you can simply hit “Send” on the Tracker List call and it will return data pertaining to all trackers for the given user.
The most important data here will be the “id,” which is our key for the specific device. We recommend putting this into the environment variables as well:
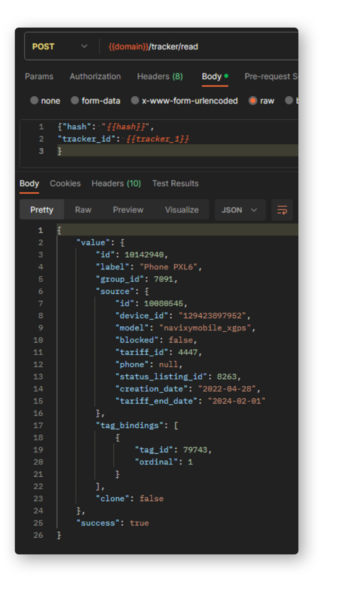
Once complete, you can then run the Tracker Read call by simply hitting “Send” as well. Please note you can also change the tracker_id manually within the body of the call, or add your own variables for ease of use later. The “Read” call presents similar information as “List,” however for this situation we are demonstrating that you can receive data for a specific device:
I hope this overview of our API helps kickstart your understanding and use of the Navixy API. As always, you can review our documentation for more information regarding any topic, or reach out to our Support team for assistance.

