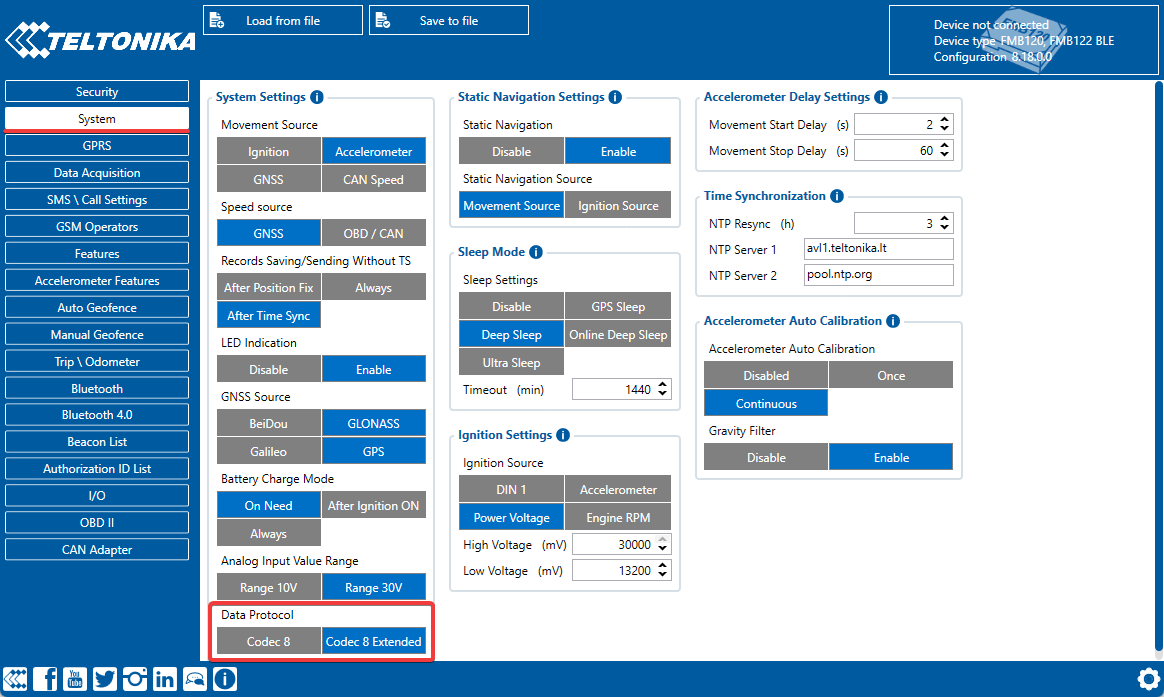
Enabling Codec 8 Extended in the Teltonika configurator
Enabling Codec 8 Extended in the Teltonika configurator
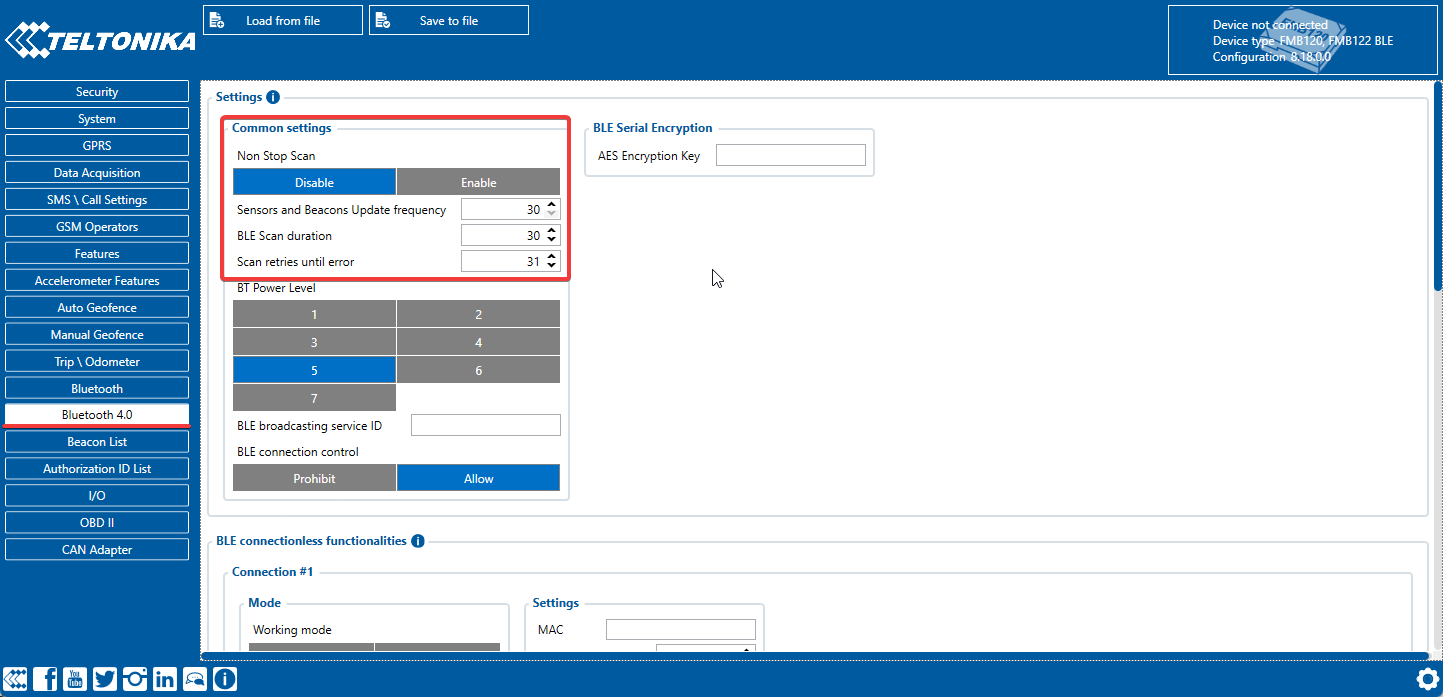
Scan frequency for BLE sensors
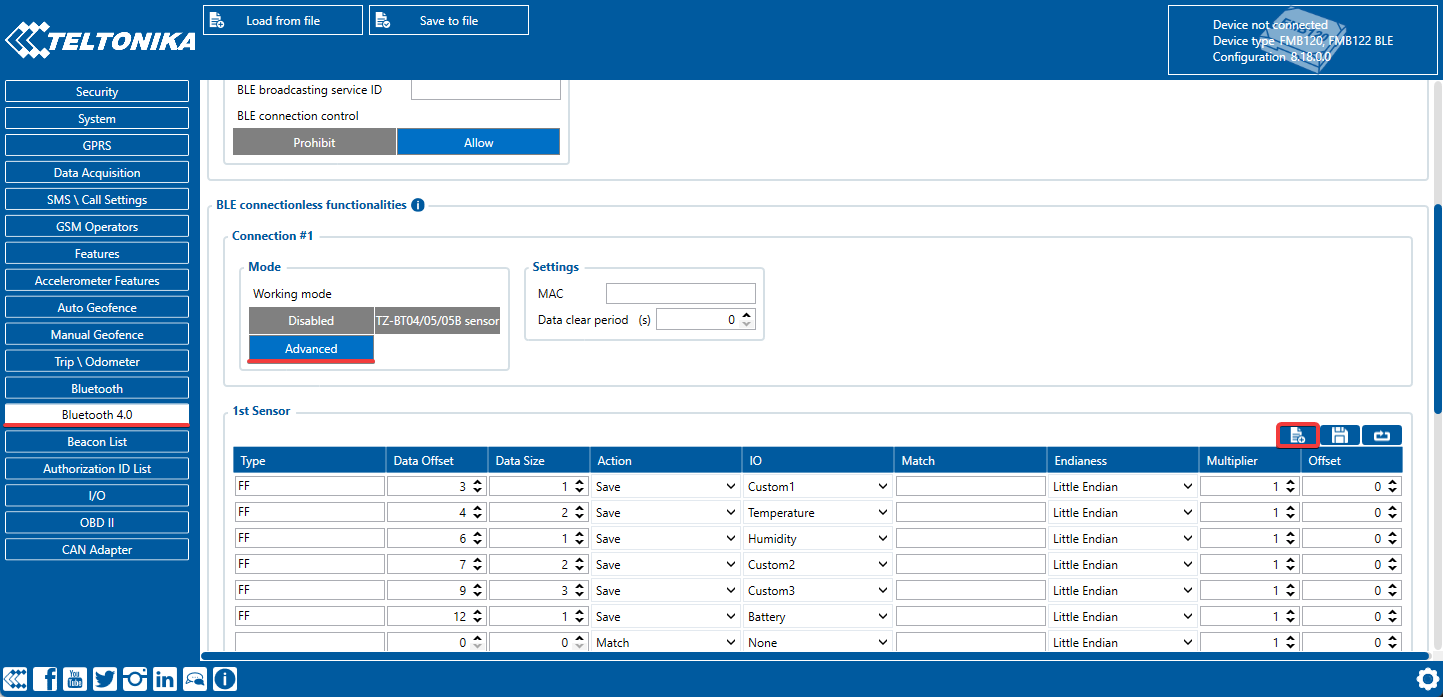
Setting the Advanced mode for the sensor and the location of the Preset list button
Setting up the sending of sensor data in device packets
Setting up the Virtual Sensor to read the Eye sensor's motion status
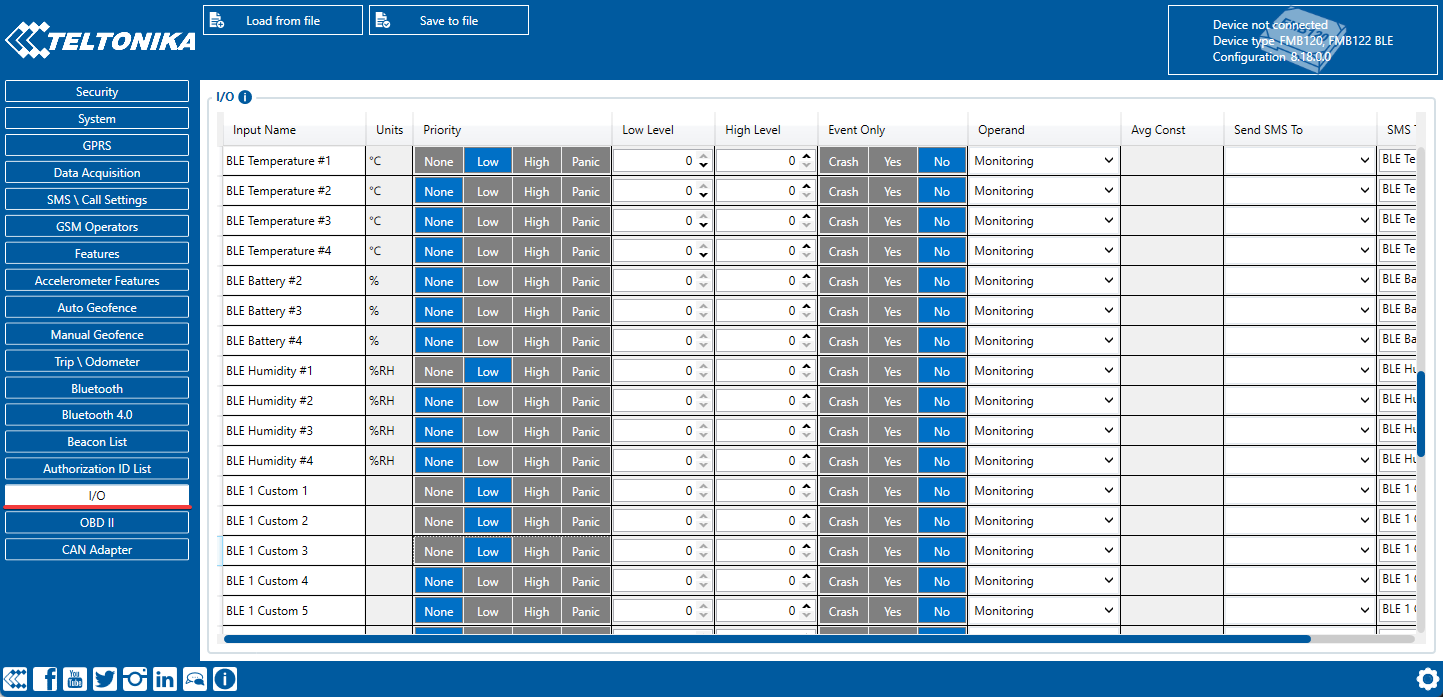
Setting up the BLE humidity sensor
Setting up the BLE temperature sensor
Example of setting the magnet state sensor with its values and name