MQTT devices are becoming more and more prevalent in GPS tracking and telematics.
These devices provide high flexibility in configuration and can perfectly match your business needs. They also require a special approach when it comes to configuring them.
Below you can find several examples on how to successfully connect MQTT devices to the Navixy platform.
Devices which are working via MQTT use the Publisher/Subscriber model which is different to client-server model. Below we will describe both models and their main differences.
Publisher/Subscriber model
Usually, in the common client → server communication model, the device works as a client and simply sends data packets to the server, which in due time sends responses and commands to the device. As you can see, this scheme is many to one. But the MQTT model with publishers and subscribers works differently.
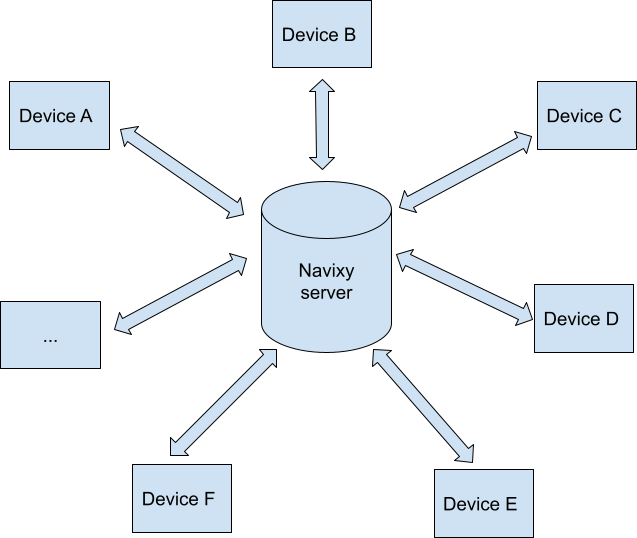
Client - server model
Within the MQTT subscriber can be a publisher and vice versa. For example, a device (Publisher) which works via MQTT protocol is sending data to the broker. Now data packets are stored on the broker’s side. After that, a client registers this tracker on the Navixy server (Subscriber). After that, the Navixy server knows the IMEI of the device and it also knows the address of the broker (it is hardcoded). Now the Navixy server can subscribe to data packets from a specific device.
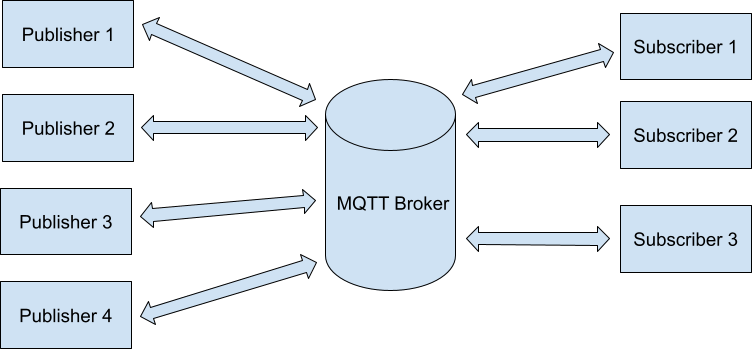
Publisher - subscriber model
If the device (Publisher) sends data packets to the broker. They will be automatically sent to other participants who have previously subscribed to this data, for example, the Navixy server (Subscriber).
If the Navixy user wants to switch the output, this action requires sending a command to the device. The Navixy server should start working as a publisher and the device should work as a subscriber. We will describe how it works below.
In the client server model, you point the device to the Navixy server directly. Within the MQTT Publisher/subscriber model, you point the device to the MQTT broker, which is used by the Navixy server to obtain information.
How to register Xirgo Global (ex BCE) devices
1. Configure device in the FMSET
Xirgo Global devices should also be configured in the FMSET software, where you can change the device settings. Here you can find the link to the configurator: https://xdm.xgfleet.eu/login
1. Log into your FMSET account.
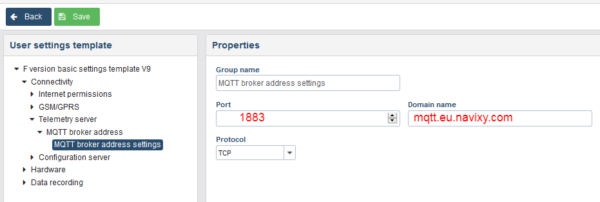
2. Enter the Connectivity → Telemetry server → MQTT broker address settings.
3. Specify the following parameters as shown on the screenshot:
- EU server: mqtt.eu.navixy.com port: 1883
- US server: mqtt.us.navixy.com port: 1883
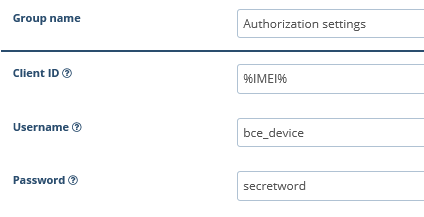
4. In MQTT Security -> Authorization add a user with default settings:
- Client ID: %IMEI%
- Username: bce_device
- Password: secretword
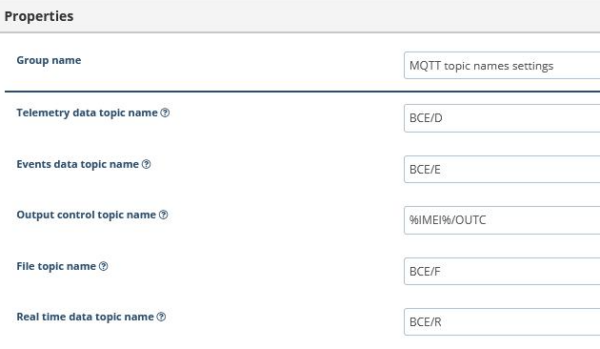
5. Check that your topic configuration is correct:
- All topics except for Output control topic name are set to default values.
- Output control topic name must be set to %IMEI%/OUTC
6. Save your configuration
Using the example of MQTT compatible Xirgo Global devices we can understand when a device works as a subscriber and as a publisher. Each topic with “BCE” in the beginning means that in these cases the device works as a publisher. For telemetry data, events, files and real time data device works as a publisher and simply sends these packets to the broker, where these data packets could be extracted by the Navixy server. Communication between subscribers and publishers is implemented through the topics. Each topic corresponds to a specific type of message.
But for commands for switching the output device works as a subscriber. It expects to receive a command from the Navixy server with his IMEI through the broker. In this case the device understands that it should switch the output.
Also, when a customer configures the MQTT compatible device, he should specify user and password which are expected on the server side. These settings you can also find on the screenshots above.
2. Add device on the Navixy platform
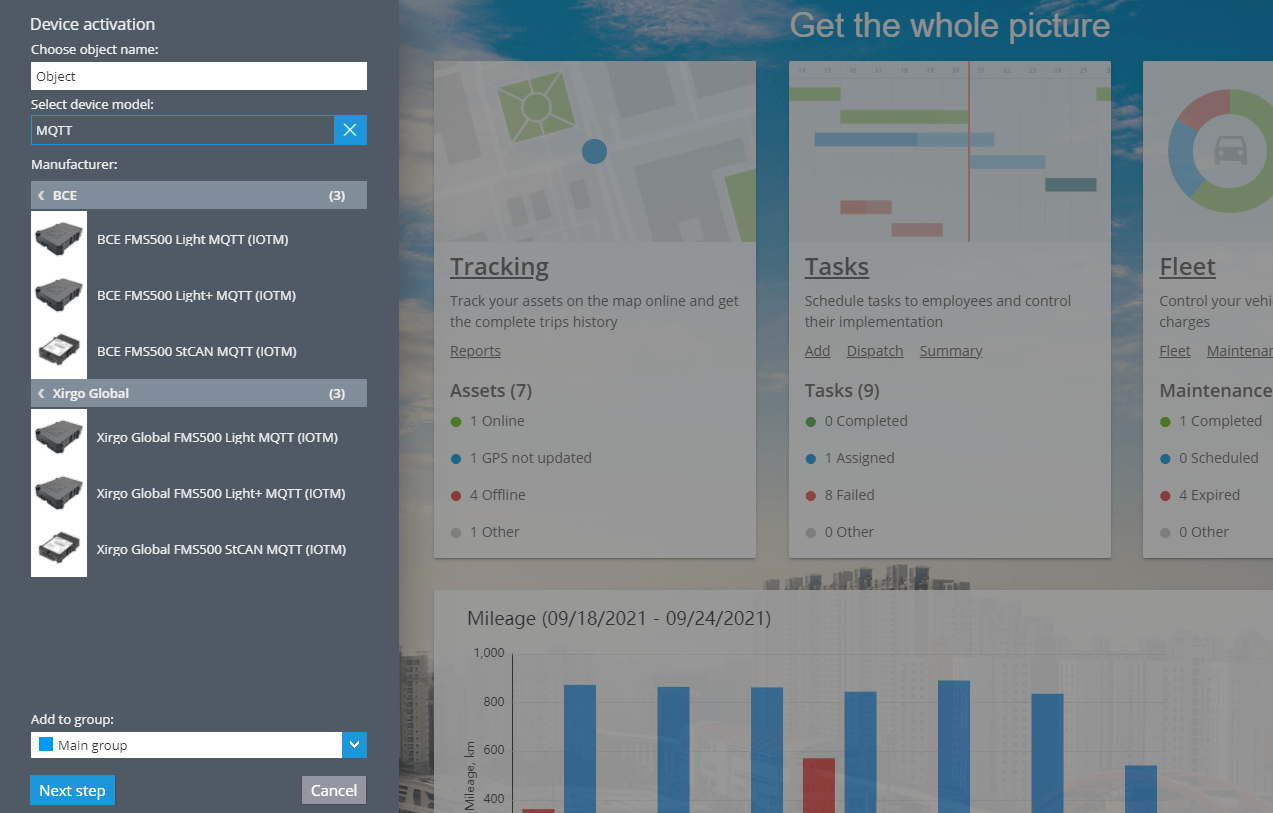
1. Enter your user account
2. Select Xirgo Global (BCE) MQTT-compatible device (marked as IOTM)
3. Click “Next Step”
4. Specify the IMEI of the device
5. Click the “Activate” button
How to register Globalmatix xTCU devices
1. Configure the device
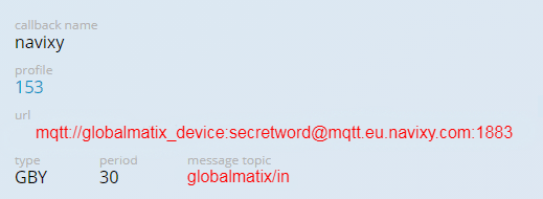
xTCU device should be configured according to the following settings:
- EU server: mqtt.eu.navixy.com:1883
- US server: mqtt.us.navixy.com:1883
- Topic: globalmatix/in
- Login / password: globalmatix_device / secretword
The final result should look as shown on the screenshot.
